Testing Facebook Conversion API (CAPI) events ensures that your server-side tracking is working correctly and that events are being sent to Meta without errors. This guide walks you through testing CAPI events using Meta Events Manager and a Test Event Code.
Why Testing CAPI Events Is Important
Testing helps you:
- Confirm that server-side events are firing correctly
- Validate your Pixel (Dataset) connection
- Detect missing or misconfigured parameters
- Ensure accurate conversion tracking for ads
Before running ads, always test your CAPI events to avoid data loss.
Prerequisites
Before you start, make sure you have:
- A Meta Pixel (Dataset) created
- Your Dataset ID (Pixel ID)
- A Conversion API access token
- Server-side tracking enabled (CAPI ON)
Step 1: Open Events Manager
- Log in to Meta Business Suite
- Click the menu icon (☰) at the top-left
- Navigate to Advertise → Events Manager
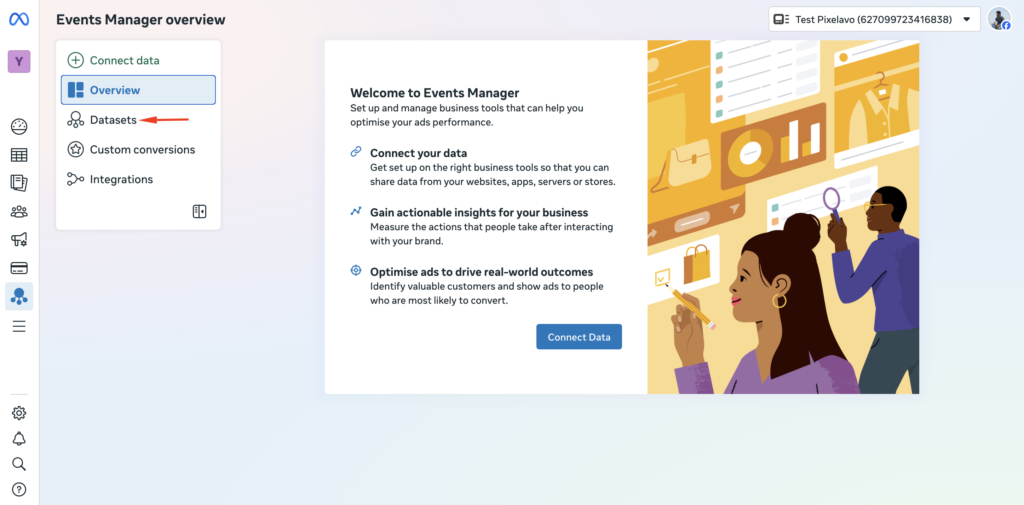
- From the left sidebar, click Datasets
Choose the “Data Sources” option from the menu.
Step 2: Select the Correct Pixel (Dataset)
- In the Datasets list, select the Pixel you want to test
(for example:pixelavo) - Make sure the correct dataset is selected — events will only appear for the active Pixel

Tip:
If your Pixel is not visible, it may not be set up yet, or it could be associated with a different business account or ad account. Make sure you’ve selected the correct business asset or switch to the appropriate business portfolio.
Step 3: Open the Test Events Tab
- After selecting the dataset, click the Test events tab at the top
- This section allows you to verify both browser and server events
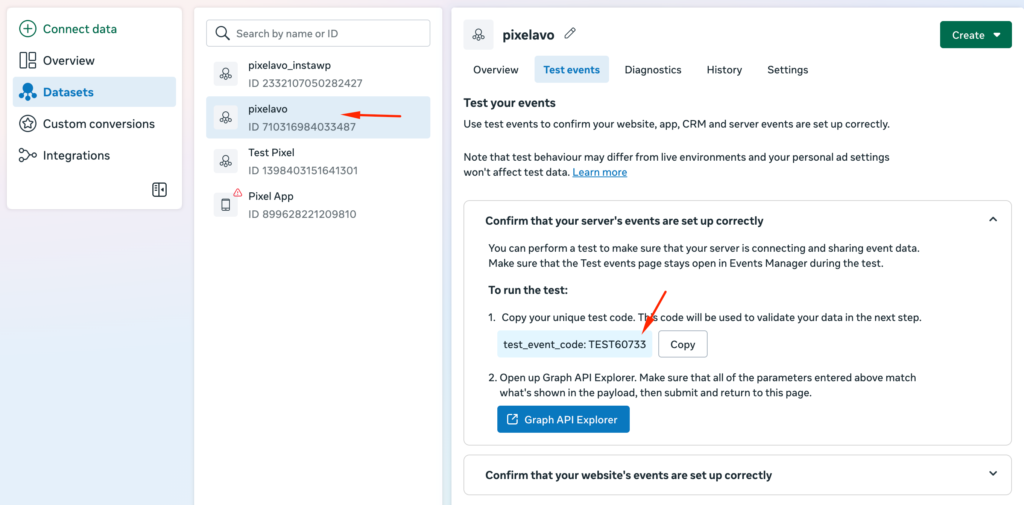
Step 4: Copy the Test Event Code
- In the Test events section, locate the Test Event Code
- Click Copy to copy the code
Example:TEST60733
This code temporarily links incoming events to the Test Events panel.
Step 5: Add the Test Event Code to Your CAPI Settings
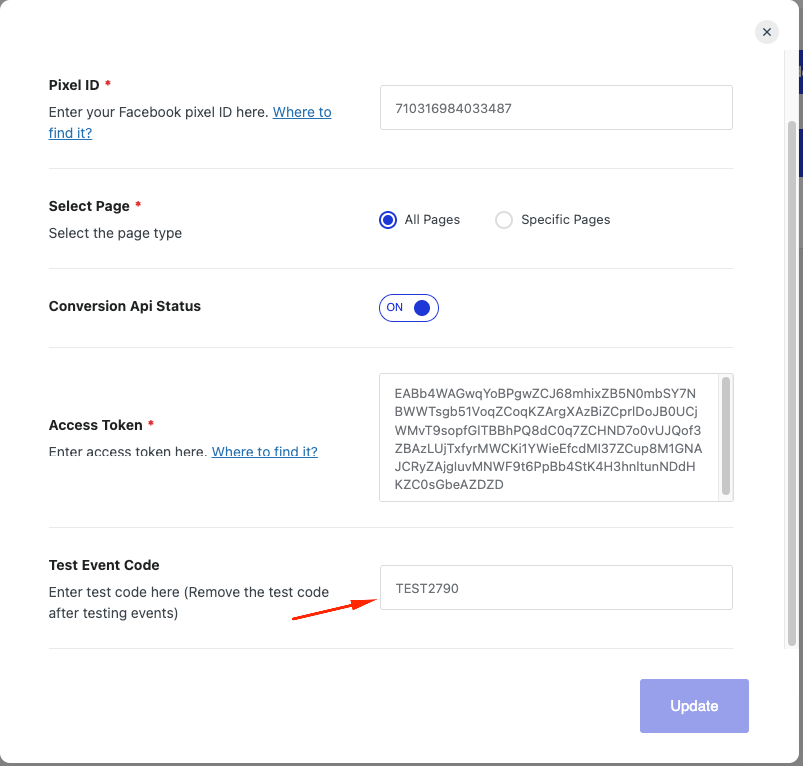
- Open your website or plugin’s Facebook Pixel / CAPI settings
- Paste your Dataset ID (Pixel ID)
- Make sure Conversion API Status is enabled
- Paste your Access Token
- Paste the copied Test Event Code into the Test Event Code field
- Save or update the settings
Important:
The test event code is only for testing. Remove it after successful verification.
Step 6: Trigger Events on Your Website
- Keep the Test events page open in Events Manager
- Visit your website in a new tab
- Perform actions such as:
- Page view
- Add to cart
- Checkout
- Purchase
- Events should start appearing in real time under Test events
Step 7: Verify Events Are Received
When events are sent successfully, you will see:
- Event name (e.g.,
PageView,Purchase) - Event source (Server)
- Timestamp
- Status confirmation
If events appear here, your CAPI setup is working correctly.
Step 8: Remove the Test Event Code
After testing is complete:
- Go back to your Pixel or plugin settings
- Remove the Test Event Code
- Save changes
This ensures live production data is not marked as test traffic.
Troubleshooting: Events Not Showing?
If test events are not visible:
- Ensure the correct Pixel (Dataset) is selected
- Confirm the Access Token is valid
- Make sure CAPI is enabled
- Check that the Test Event Code matches exactly
- Verify events are being triggered on your site
- Switch to the correct business account or ad account if needed
Best Practices for CAPI Testing
- Always test after updating Pixel or CAPI settings
- Keep the Test Events page open during testing
- Remove the test code once testing is complete
- Use both browser and server tracking for better data accuracy
Final Notes
Testing Conversion API events is a critical step to ensure accurate tracking, better ad optimization, and reliable conversion data. Once your test events appear successfully, your Facebook CAPI setup is ready for production use.